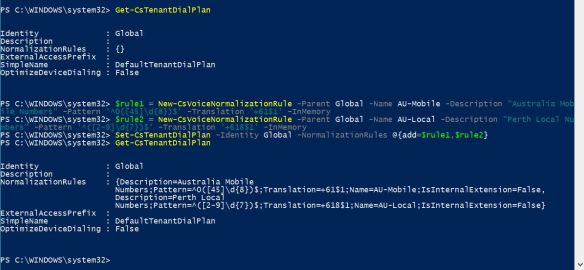
In this article, i’m going to cover the configuration that involves in configuring the AudioCodes Mediant VE (Virtual Edition) with Microsoft Teams using Direct Routing. Let’s start with the required ingredient list;
- Certified SBC for Direct Routing. In my case, it’s AudioCodes Mediant VE, version 7.20A.156.028 (Newer Firmware versions will require dedicated Teams License in SBC)
- AudioCodes SBC and Teams licenses
- Public Certificate with a SAN record with the host name of the SBC (.pfx file).
- Public IP address
- Firewall Rules
- Public DNS Record
SBC Deployment Topology
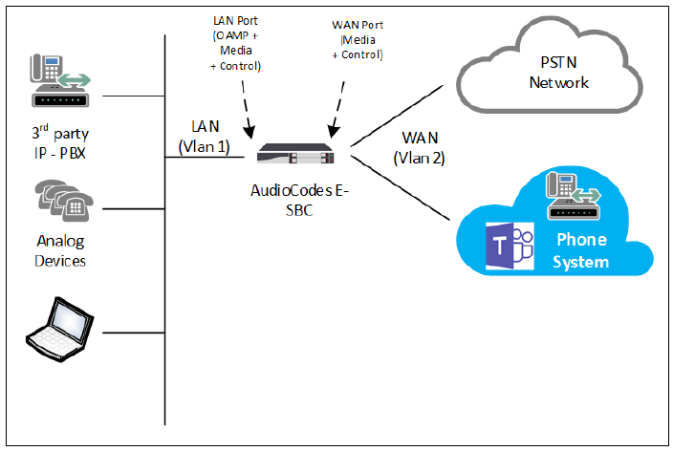
Just to explain a bit about the supporting infrastructure for the SBC, specifically Network layer, the SBC is configured as a multi homed devise where one interface is in DMZ and the other interface is in LAN network. The reason for this setup is to secure the corporate network from potential threats from in the internet. As one of the Gateway interfaces will be opened to the internet, it’s recommended to follow this process.
SBC it self is a secured devise. So nothing other than allowed SIP traffic can be passed on to the corporate network.
Public DNS and Firewall rules
A set of Firewall rules need to be defined, so that Teams SIP Proxy can communicate with the SBC. At Teams end, there are 3 Sip Proxies. Those are, sip.pstnhub.microsoft.com (Global FQDN), sip2.pstnhub.microsoft.com (Fail over FQDN), sip3.pstnhub.microsoft.com (Fail over FQDN). These DNS records resolve to below IP addresses;
- 52.114.148.0
- 52.114.132.46
- 52.114.75.24
- 52.114.76.76
- 52.114.7.24
- 52.114.14.70
The required firewall rules for SIP Signalling are below;
| Traffic | From | To | Source port | Destination port |
|---|---|---|---|---|
| SIP/TLS | SIP Proxy | SBC | 1024 – 65535 | Defined on the SBC |
| SIP/TLS | SBC | SIP Proxy | Defined on the SBC | 5061 |
In this setup, we’ll be using the SBC Source port as port 5067. Firewall rules that are required for Media are below;
| Traffic | From | To | Source port | Destination port |
|---|---|---|---|---|
| UDP/SRTP | Media Processor | SBC | 49152 – 53247 | Defined on the SBC |
| UDP/SRTP | SBC | Media Processor | Defined on the SBC | 49152 – 53247 |
The Media port range that we’ll be using in the SBC will be the range 6000 – 6499. The IP rage within Teams that allocated for Media is;
- 52.112.0.0 /14 (IP addresses from 52.112.0.1 to 52.115.255.254).
It also requires a public DNS record configured for the IP public address that is used for DMZ interface in SBC. The public IP address can be NAT to an internal DMZ IP or, the Public IP address can be directly configured on the SBC’s DMZ interface and configure the Firewall in DMZ to control traffic.
In this setup, as i have my SBC in Azure, in’m using a NATed public IP on my DMZ interface of the SBC. And i have a DNS record configured to resolve the host name sbc.uctechie.com, against that IP address.
SBC Network Configuration
AudioCodes Mediant VE is now available as an App to be deployed in Azure. If you log in to Azure portal, you can find the app and deploy it the way you want. In this setup, I’m using AudioCodes Mediant VE app in Azure. I’m not going to cover the steps for SBC provisioning in Azure in this article.
Let’s start with configuring the network component. The LAN adapter will be already configured and accessible by now. Configure the WAN interface with a DMZ IP address as shown below;

The LAN interface must be configured to use OAMP+Media+Control applications, while the WAN interface should only do Media+Control. Both interfaces should be in dedicated VLANs. The network connectivity should looks like below;

Next, move to configure DNS. I need to configure SRV record for Teams proxy as it uses multiple host names and IP addresses. Only way to handle this within the SBC, is to configure a SRV record and configure each proxy address within the SRV it self. Navigate to Setup> IP Network> DNS > Internal SRV, and create a SRV record for teams.local as shown below;

Configure Certificates
As Microsoft Teams will only use TLS and it’s connected over the Internet, a public certificate must be used in the SBC to establish TLS sessions. My public certificate contains a SAN record for the SBC;

I will be using the above mentioned .pfx file of the public certificate here. Navigate to Setup> IP Network> Security> TLS Context, edit the default context entry and configure as mentioned below;

Once the configuration have been saved, navigate to “Change Certificate” in the same window to upload the .pfx file.
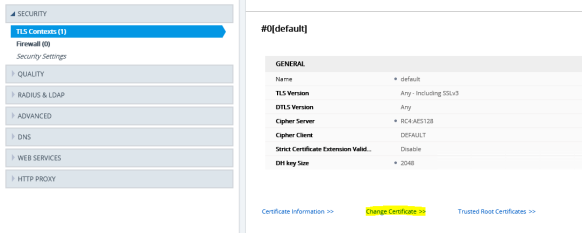
Before uploading the certificate, check the “Private Key Size” is configured as 2048 and not 1024. If it’s set to 1024, then change that to 2048 from the drop-down and click on “Generate Private-Key”. This process might take couple of seconds to complete. It’ll show as “New Private Key Configured” on the same window, upon successful configuration.


Now, we can upload the certificate. Notice the “Upload Certificate Files from Your Computer” section. Specify the Private Key pass-Phrase in the specified box. Click on “Browse” and load the .pfx file.
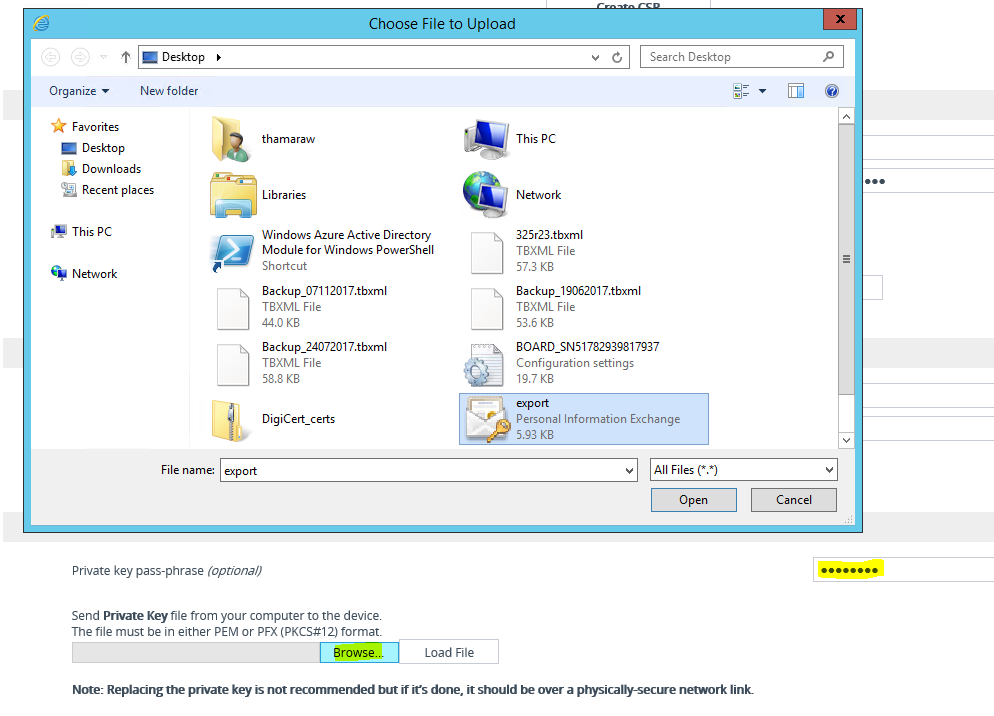
Once the certificate have been successfully uploaded, navigate back to “TLS Context” and click on “Certificate Information”. Confirm that the recently uploaded public certificate shows up with the “Status : OK”.

Go back and click on “Trusted Root Certificates” and confirm that the Root CA and subordinate CAs for public certificate appears there.If not, just import the files in.

Configure Core Components
First thing to do is, to configure the Time and Date in the SBC. Navigate to Setup> Administration>TIME & DATE, configure the Primary NTP server and UTC Offset values. Usually, the NTP server is the Domain Controller. 
Next is to configure the SRD. There should be a default SRD configured. I’m going to use that one. Navigate to Setup> Signalling & Media > Core Entities> SRDs, configure the default SRD with highlighted values as shown below;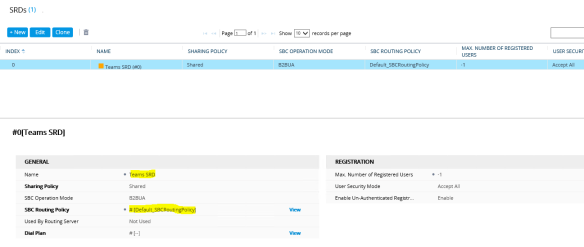
After the SRD, let’s configure a SIP Interface to be used with Teams. Navigate to Setup> Signalling & Media> SIP Interfaces, configure an Interface for Teams as mentioned below;

Moving on to configure the Media Realm, navigate to Setup> Signalling & Media >Core Entities> Media Realms. Change the “Default Realm” and create a new Realm as “Teams” as shown below;

Now to configure Proxy Sets, navigate to Setup> Signaling and Media> Proxy Sets, configure a Proxy set to be used with Teams as shown below;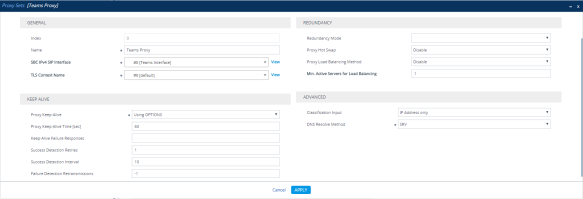
Another bit to do here. Click on “Proxy Addresses 0 items” link in the bottom of the same window. Configure a Proxy address to connect to Teams as sown below;

Now, i need to create an IP profile to be associated with the Teams IP Group. Navigate to Setup> Signaling & Media> Coders & Profiles> IP Profiles, Create a new profile with the configuration as shown below;

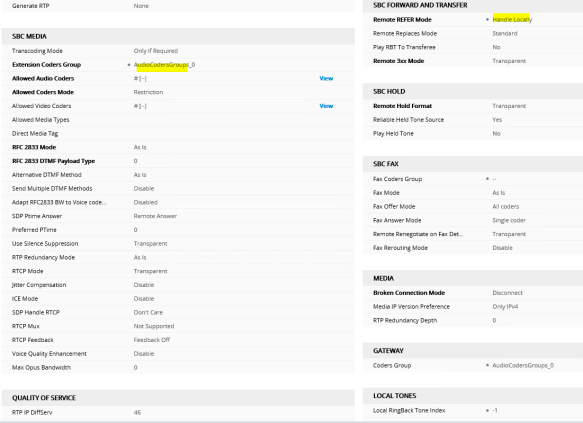
Moving on to configure the Audio Coders. The required coders for the integration with Teams are
- SILK Wide Band
- SILK Narrow Band
- G.711 A
- G.711 U
By default, G.711 A and G.711 U is included within the SBC. In order to enable SILK codecs, the Transcoding license is required.
Note : SILK Codecs are recommended as the preferred codecs to be used for the integration. Missing those, G.711 A law will still work. But will not be as optimized as using SILK Codecs. To configure Coders, navigate to Setup> Signaling and Media> Coders & Profiles> Coders Groups. Edit the existing Group _0 and add Codecs in above mentioned order
(my Lab setup does not have Transcoding licenses and i’ll be using only G.711 A and U laws. In production environment, make sure to procure the required license).

Next step is to configure an IP Group to be used for Teams. Navigate to Setup> Signaling & Media> Core Entities> IP Groups, configure the IP Group as shown below;

Media and SBC
Now we are done with the core configuration. Moving in to configure Media components. Starting by enabling Media Security and SRTP. Navigate to Setup> Signalling & Media> Media> Media Security. Configure the parameters as shown below;

Also,
- in Setup> Signalling & Media> Media> RTP/RTCP Settings, Configure “Comfort Noise Generation Negotiation” to be Enabled.
- in Setup> Signalling & Media> Media> Voice Settings, Configure “Silence Suppression” to be Enabled.
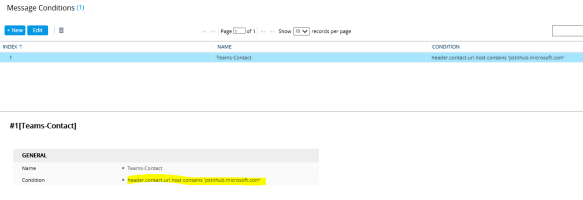
We need a Message Condition Rule, that need to be assign with the Classification. TO configure the Message Condition, navigate to Setup> Signaling & Media> SBC> Message Manipulation> Message Conditions, configure a condition as shown below;
Next to do is the SBC component configuration. Navigate to Setup> Signaling & Media> SBC> Classification, configure inbound connections from Teams to be classified as allowed and trusted source. Configure the Classification as shown below;

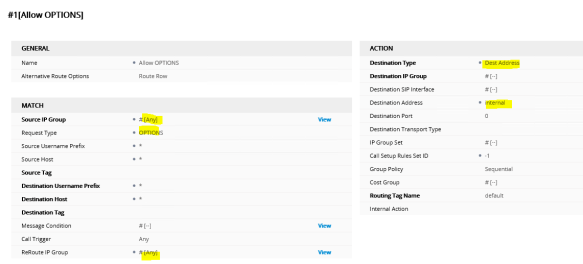
Next is to configure a Route to allow OPTIONS requests to flow between Teams Proxy and SBC. Navigate to Setup> Signaling & Media> SBC> IP-to-IP Routing and configure a route as shown below;
Now, we need to do a SIP Header manipulation. The reason behind this is, the standard OPTIONS request, the FROM header consist of the IP address of the SBC it self. Since Teams only allow TLS connections, which is based on the device host name, the IP address need to be replaced with the host name. To do this, configure a Header Manipulation rule as shown below;


Now, we need to enable this Manipulation set and assign to the Teams IP Group. To enable the Manipulation set, browse to http://<SBC IP Address/AdminPage and configure the value as mentioned below;
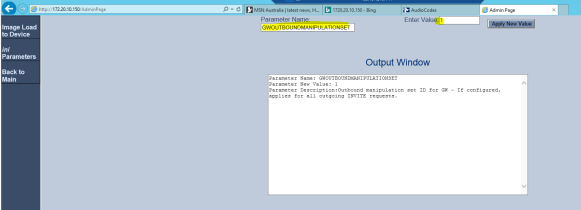
Go back to the IP Group configuration and confirm that the “Outbound Message Manipulation Set” is configured with the proper value;

Finally, we are done with the configuration. If all works well, you should see a green check mark on “Teams” IP Group in Topology View;

Also, if you go to Monitor> Monitor> VOIP Status> Proxy Sets Status, all Proxies should come up as “Online” and the active one would be marked as (*);
 Now, i’m good to make a test call from my Teams client. I’ll be calling my test mobile, which i have a route configured (in my previous blog post) to allow Mobile calls to this SBC;

And we have an inbound call from Teams, coming in to the SBC. Notice the IP address of the inbound SIP message and the User Agent header in the message. The call comes from Teams proxy server. We can confirm that we have a functional integration between Microsoft Teams and Mediant VE SBC. Please post any comments that you have in comment section below. Thanks.


