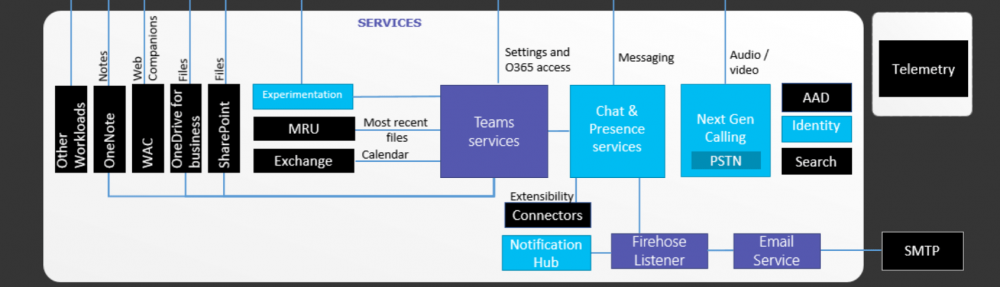
If you are using Microsoft Phone system in O365, you might already be using Call Queues and Auto Attendant features. For those who haven’t use them yet (you might be still using Skype for Business Server on-premises), Call Queues are the equivalent of Response Group Services Hunt Groups. Auto Attendant is the online version of Response Groups IVR. This also replaces the Auto Attendant feature in Exchange UM.
If you are using on-premises Skype for Business server and thinking about moving to Skype for Business online (which you should), and want to use the same PSTN numbers that you use in on-premises server for hunt groups, then this explains how you can do that.
Typically, Call Queues and Auto Attendant services needs a “Service Number” that acquired from Microsoft to be associated with these services. This is fine if the deployment is a “green field” deployment and no numbers have been published outside. But, using services numbers will be challenging when moving on on-premises platform to Teams or SfBO as already published numbers need to be changed.
In this article, i’m going to explain how you could retain the existing published hunt group numbers and move to SfBO, using Cloud Connector Edition. This article only applies to;
- Cloud Connector Edition deployments for Skype for Business Online (SfBO)
- AudioCodes Mediant SBC in use for PSTN integration.
**This article does not applies to Direct Routing with Microsoft Teams.
First, let’s create the Call Queue in Skype for Business Admin Portal. Log in to O365 portal and navigate in to Teams\Skype for Business Admin Portal.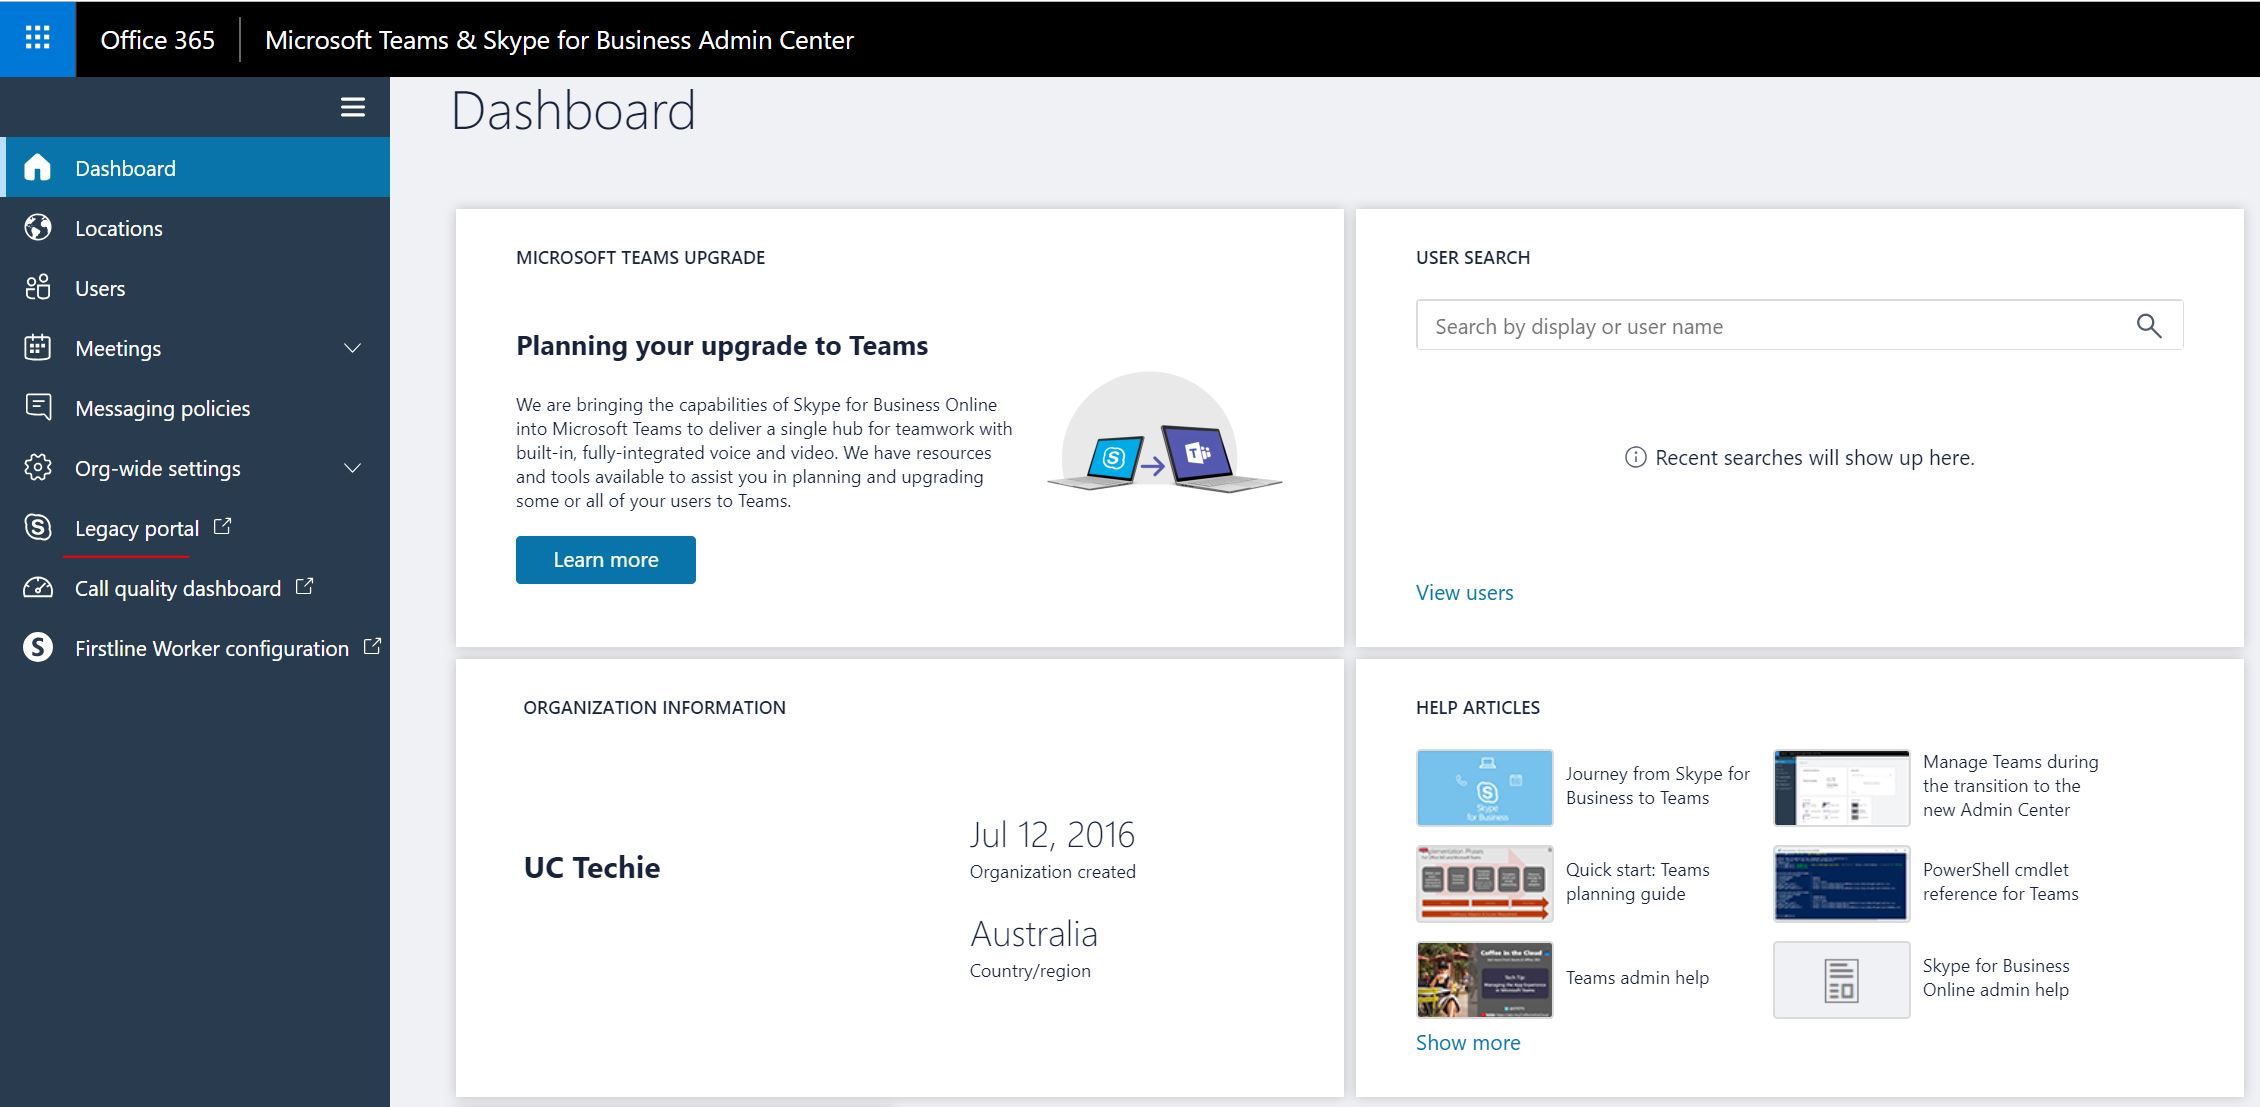
Then select the “Legacy Portal” option (Enterprise Voice related components have not yet migrated in to the new Admin portal). In Legacy Portal, go to “Call Routing” section. 
Click on “Add New” to create the new Call Queue. Set a name for the Call Queue and select the domain. Note down the domain that you have used as it will be required later on. Set the call distribution method the way you want and the AD group that contain the users who will be participating in the queue. Save the configuration when done.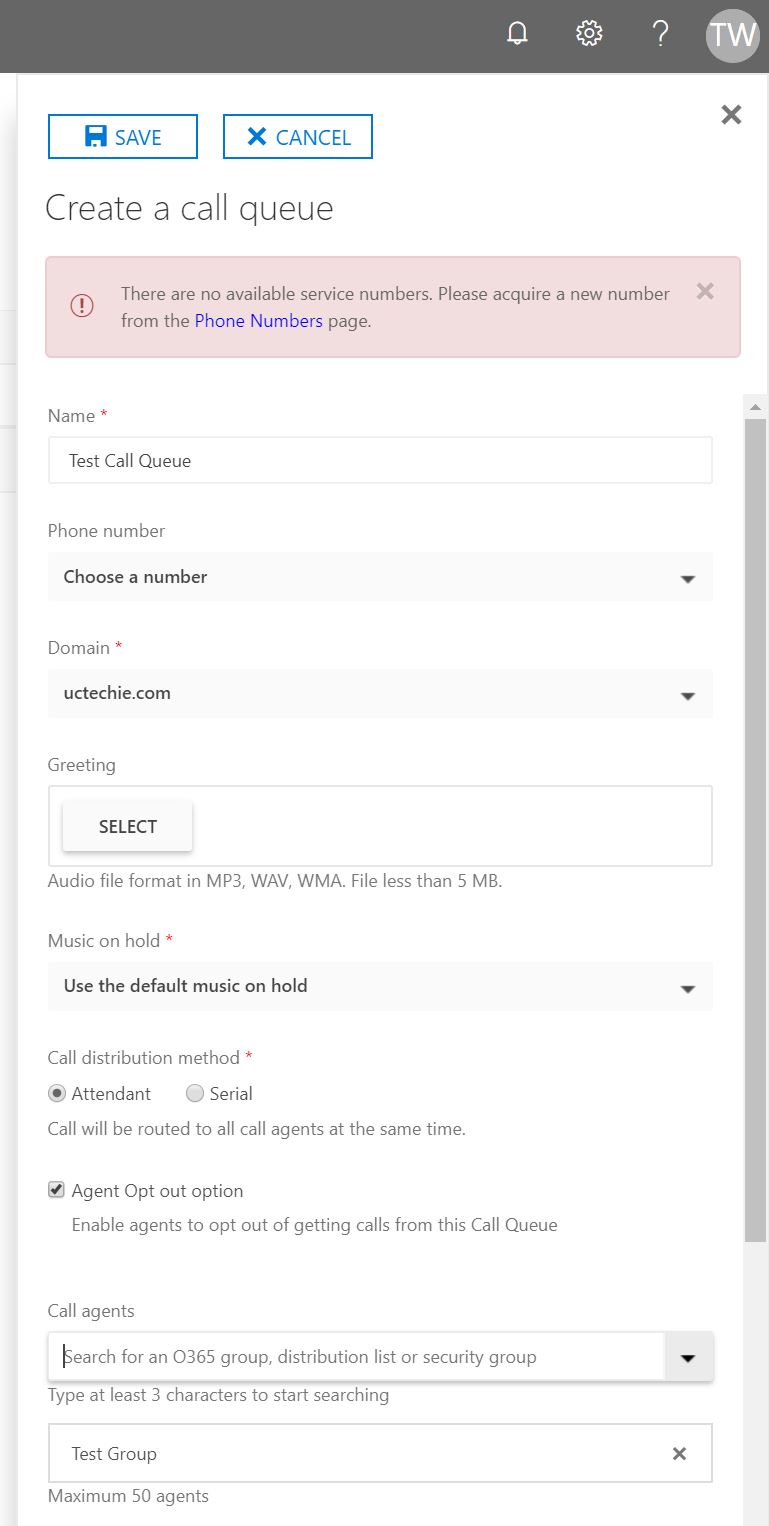
Once the object is created, note down the user part of the SIP URI of the object. We will be using this in AudioCodes gateway.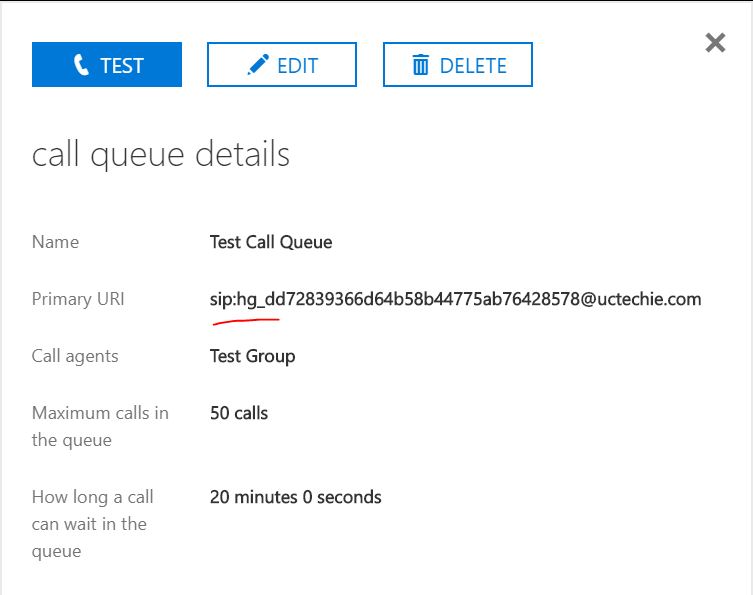
So the O365 bit is done. Now, log in to the AudioCodes SBC. In the SBC, on the IP Group that was created for SfBO, configure the domain that you have selected above, in to the “SIP Group Name” field. This is important as this domain name will override the host component of the INVITE request that goes in to SfBO. If the domain mentioned in here does not match up with the domain that was selected in Call Queue, the the call will fail to connect.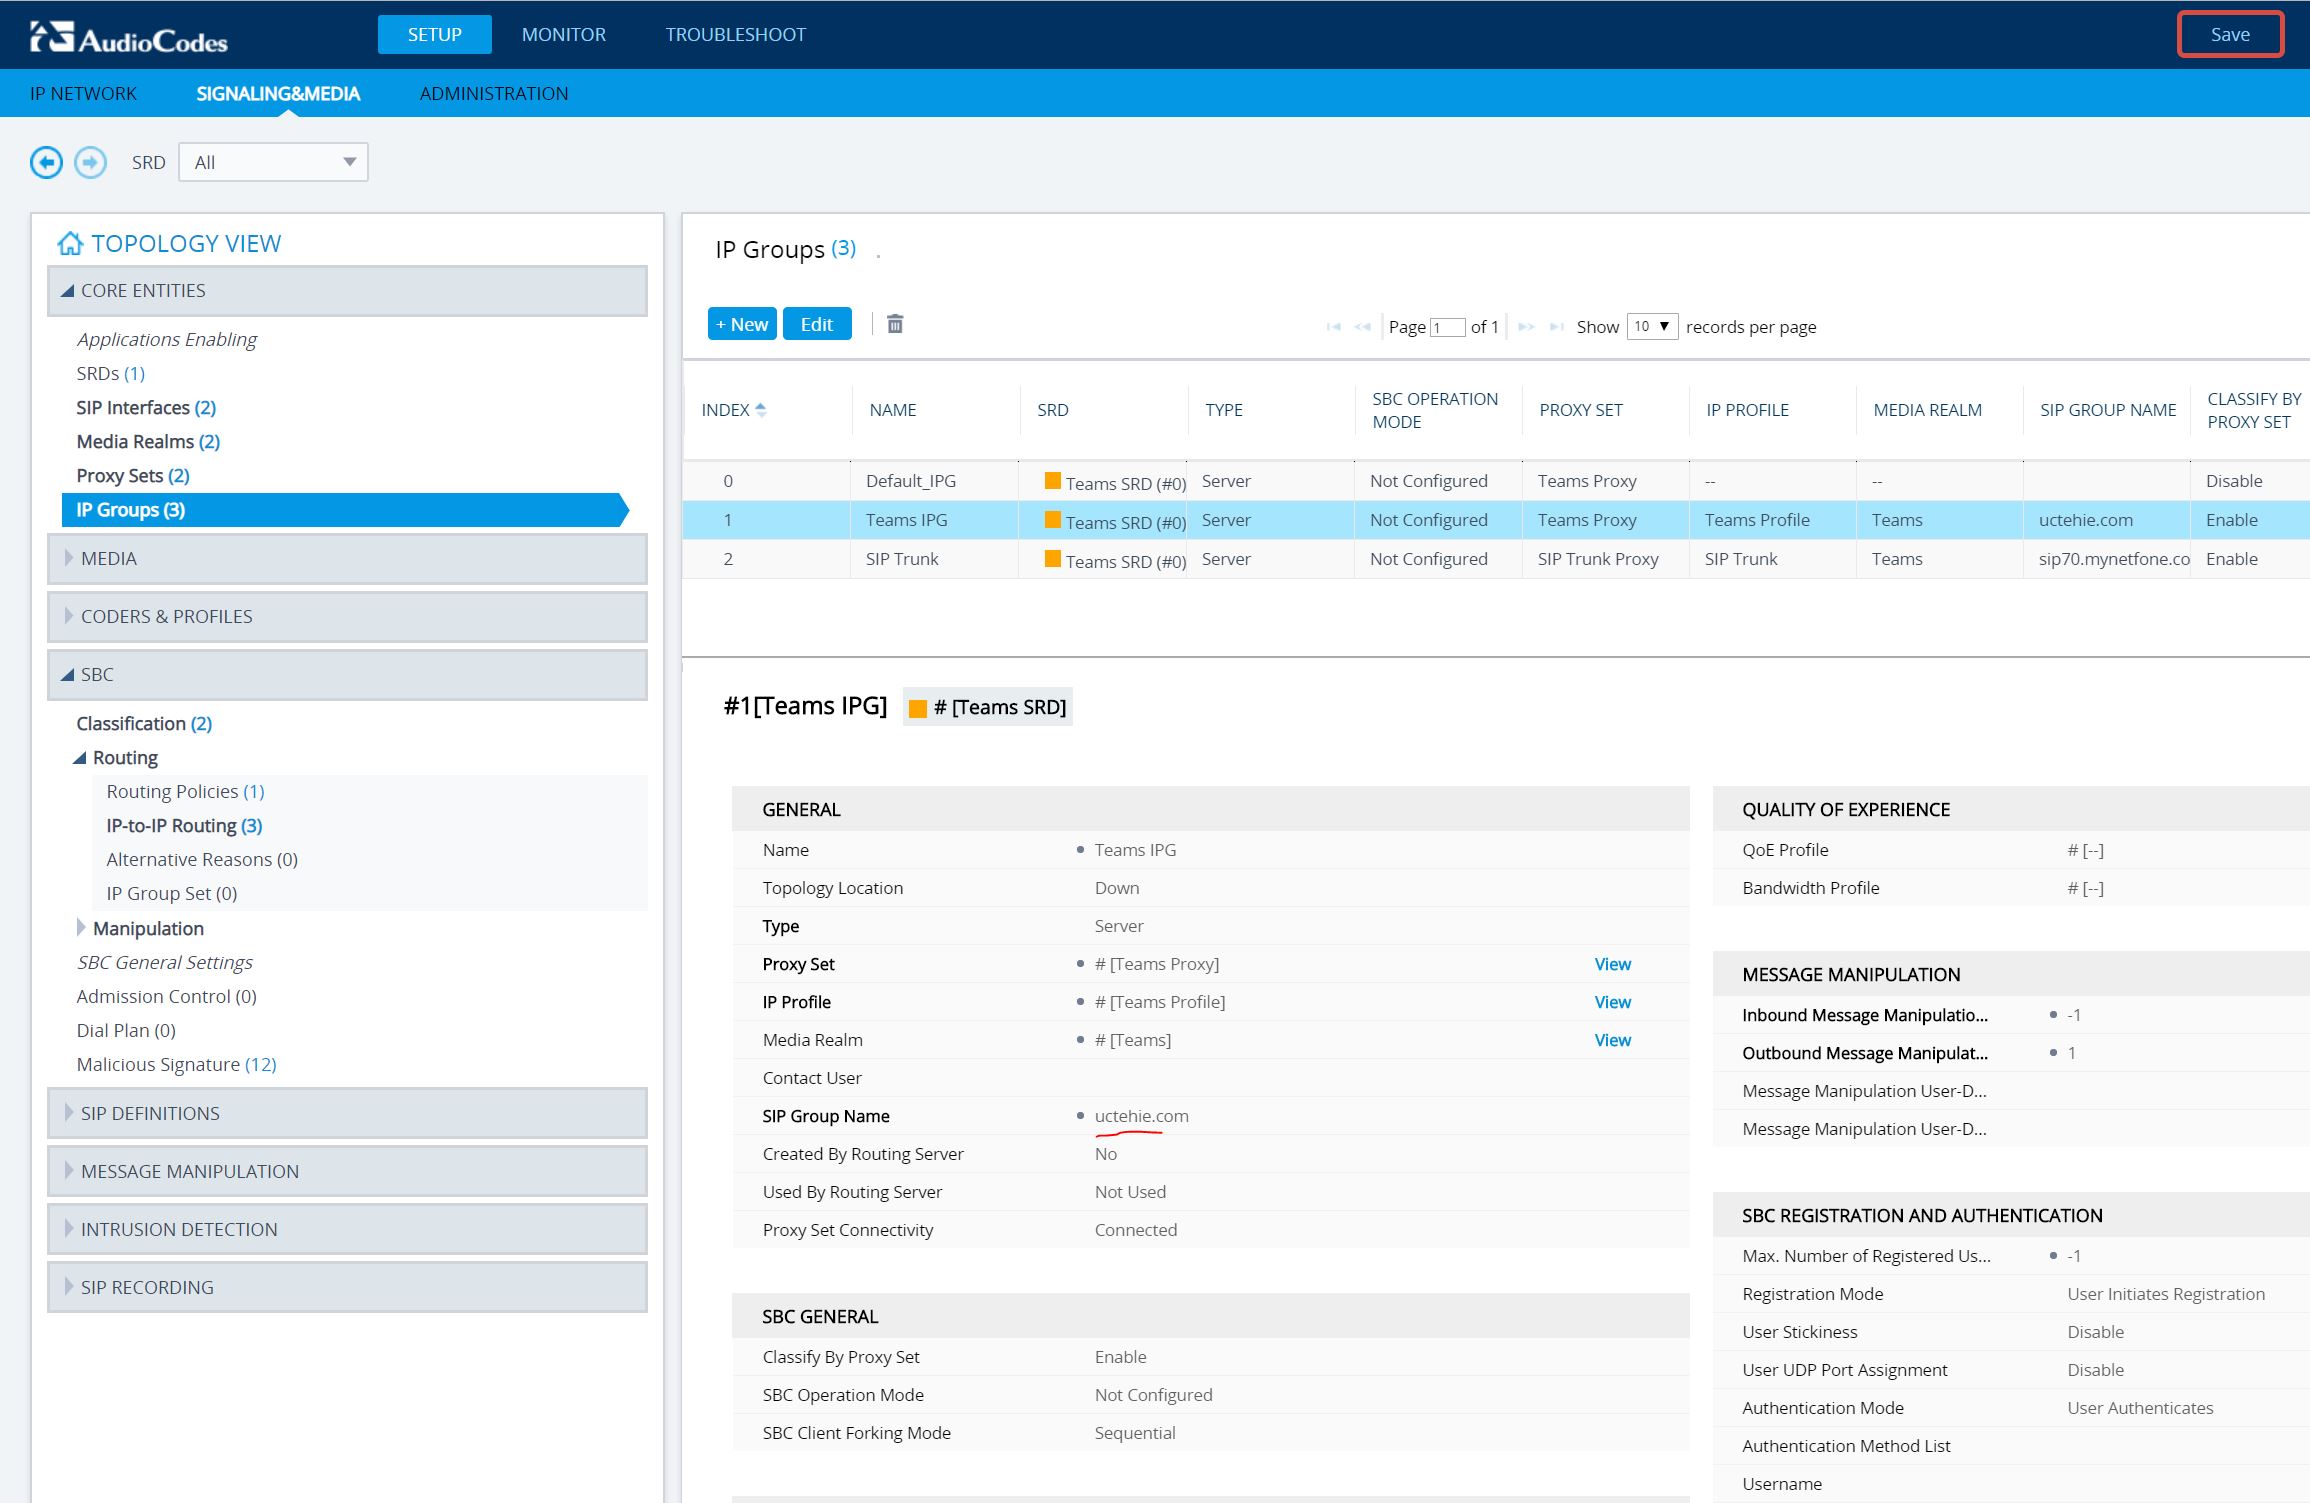
Next s to confirm that the call routing is in place. In the SBC, there should be a route configured to send calls to SfBO. If it is a standard Direct Routing or CCE deployment, the there should be a route configured to send all calls to O365. Below snapshot shows a rote entry that configured to send all calls from SIP Trunk to be sent to SfBO. The numbers are already in E.164 format. Otherwise, you will need to normalize it to convert to E.164.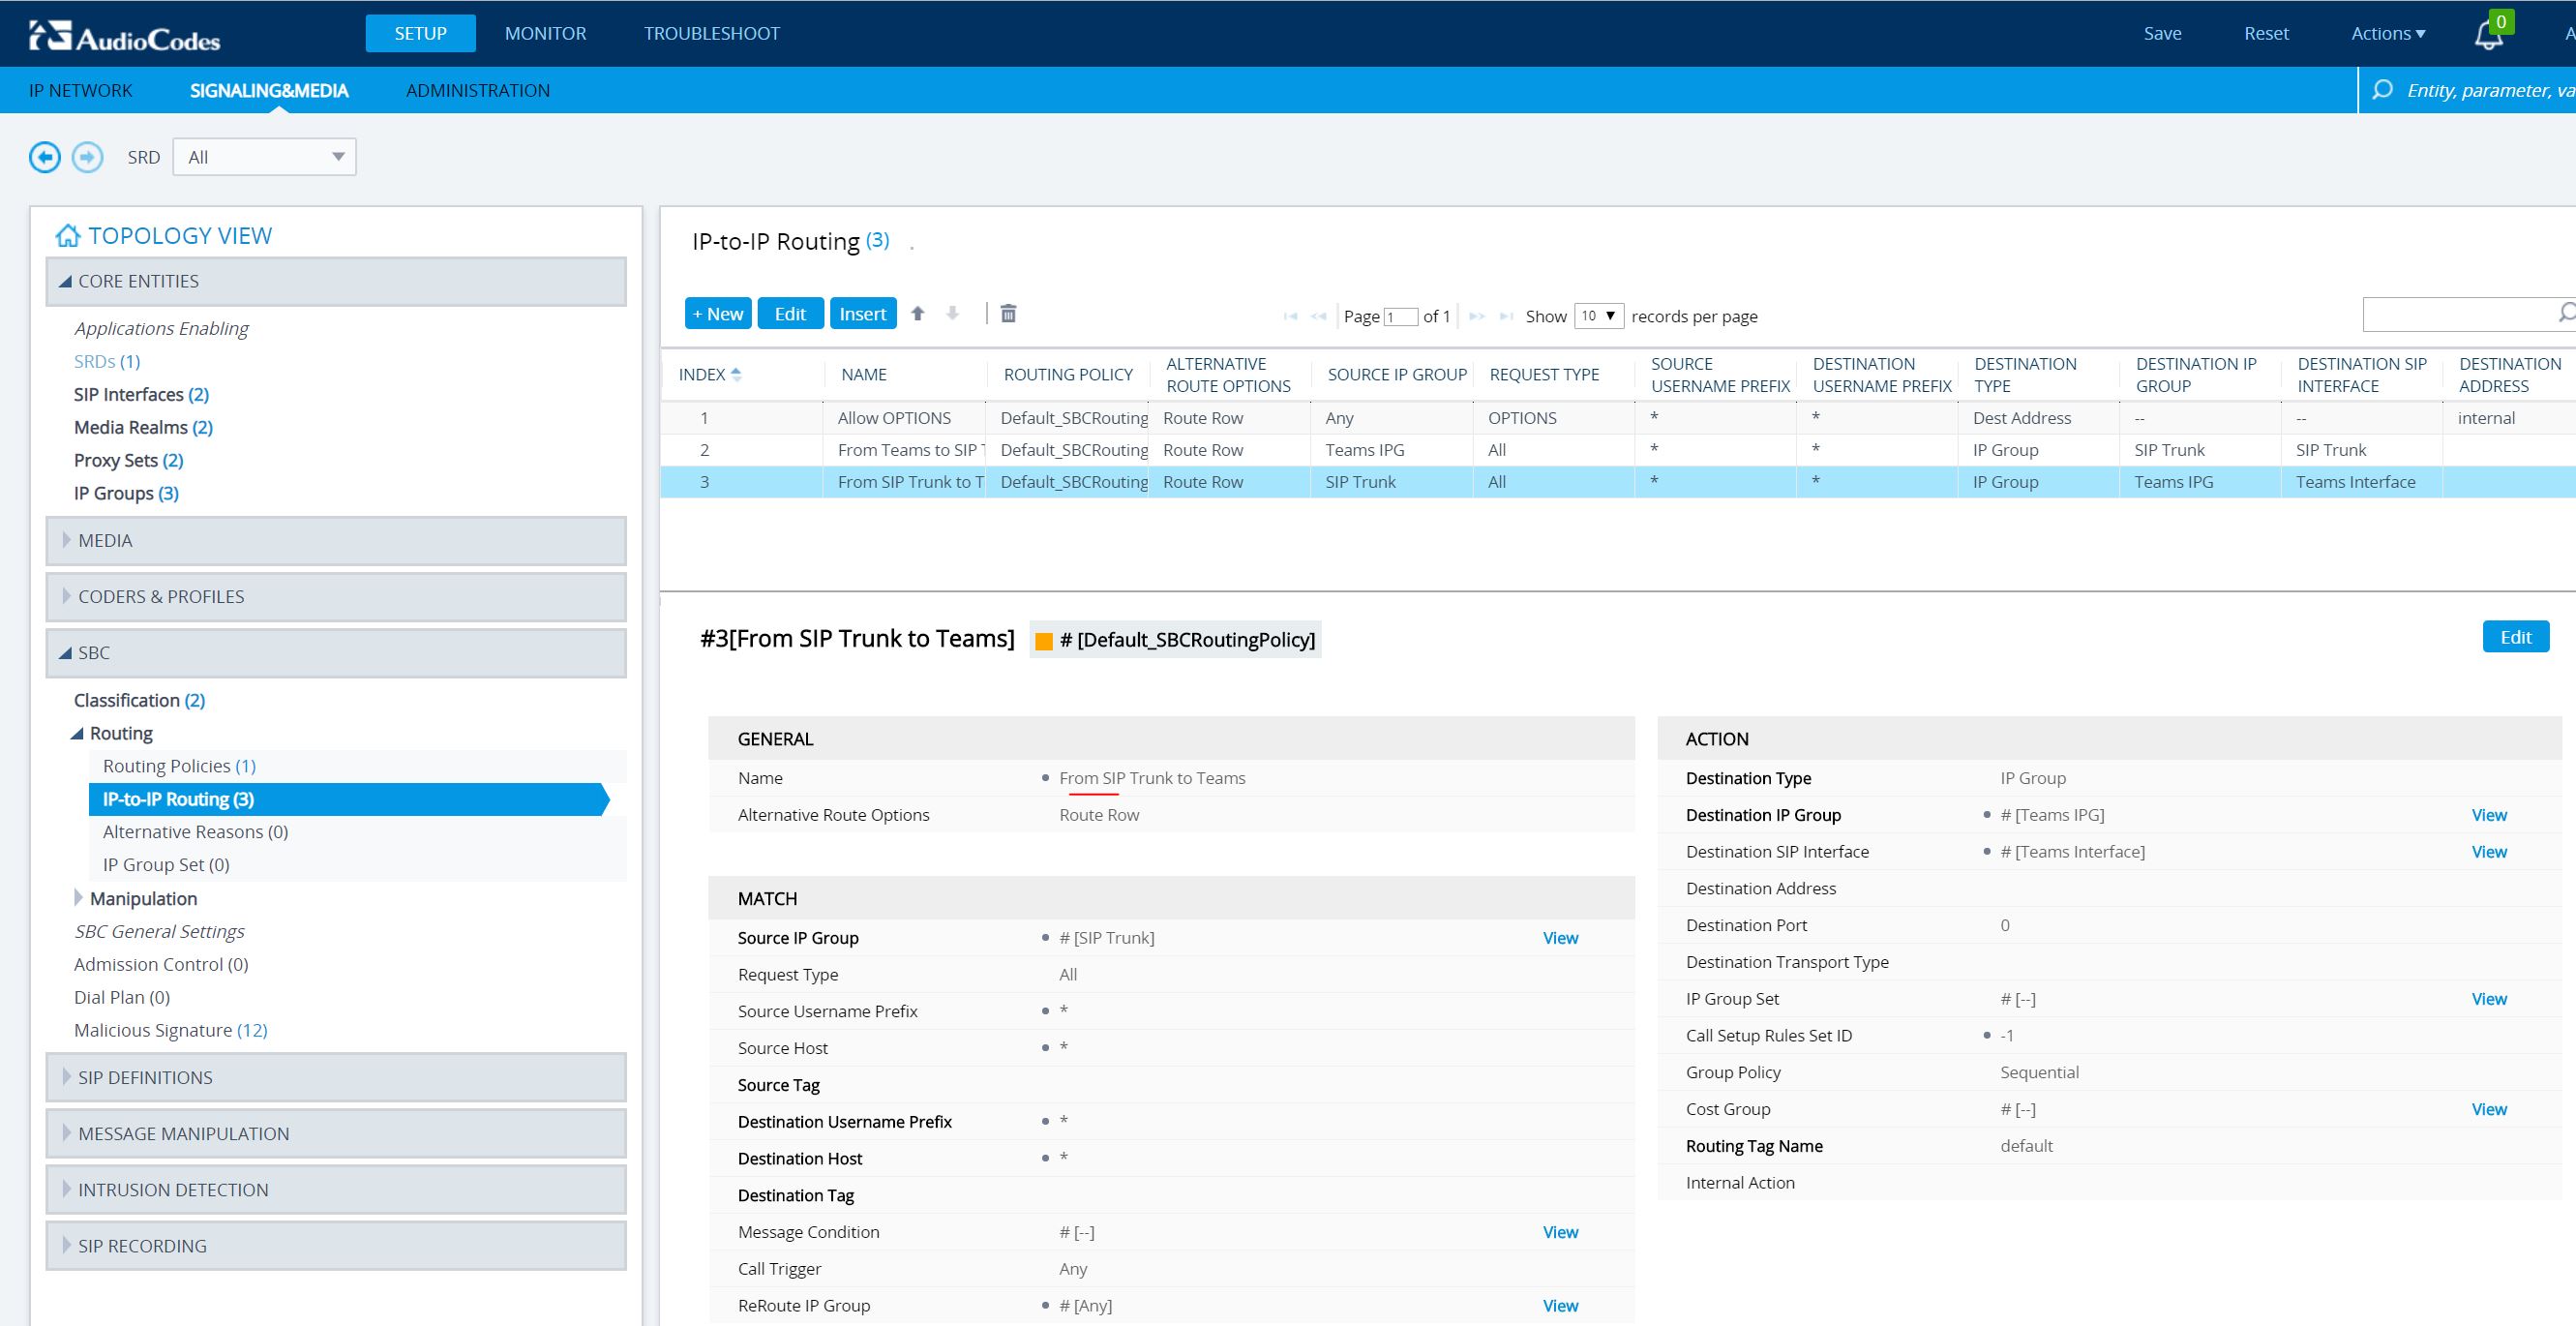
The last component is to configure a manipulation rule to convert the published phone number, in to the user component of the Call Queue URI. Below snapshot show the on-premises PSTN number +61893231234 convert to hg_dd72839366d64b58b44775ab76428578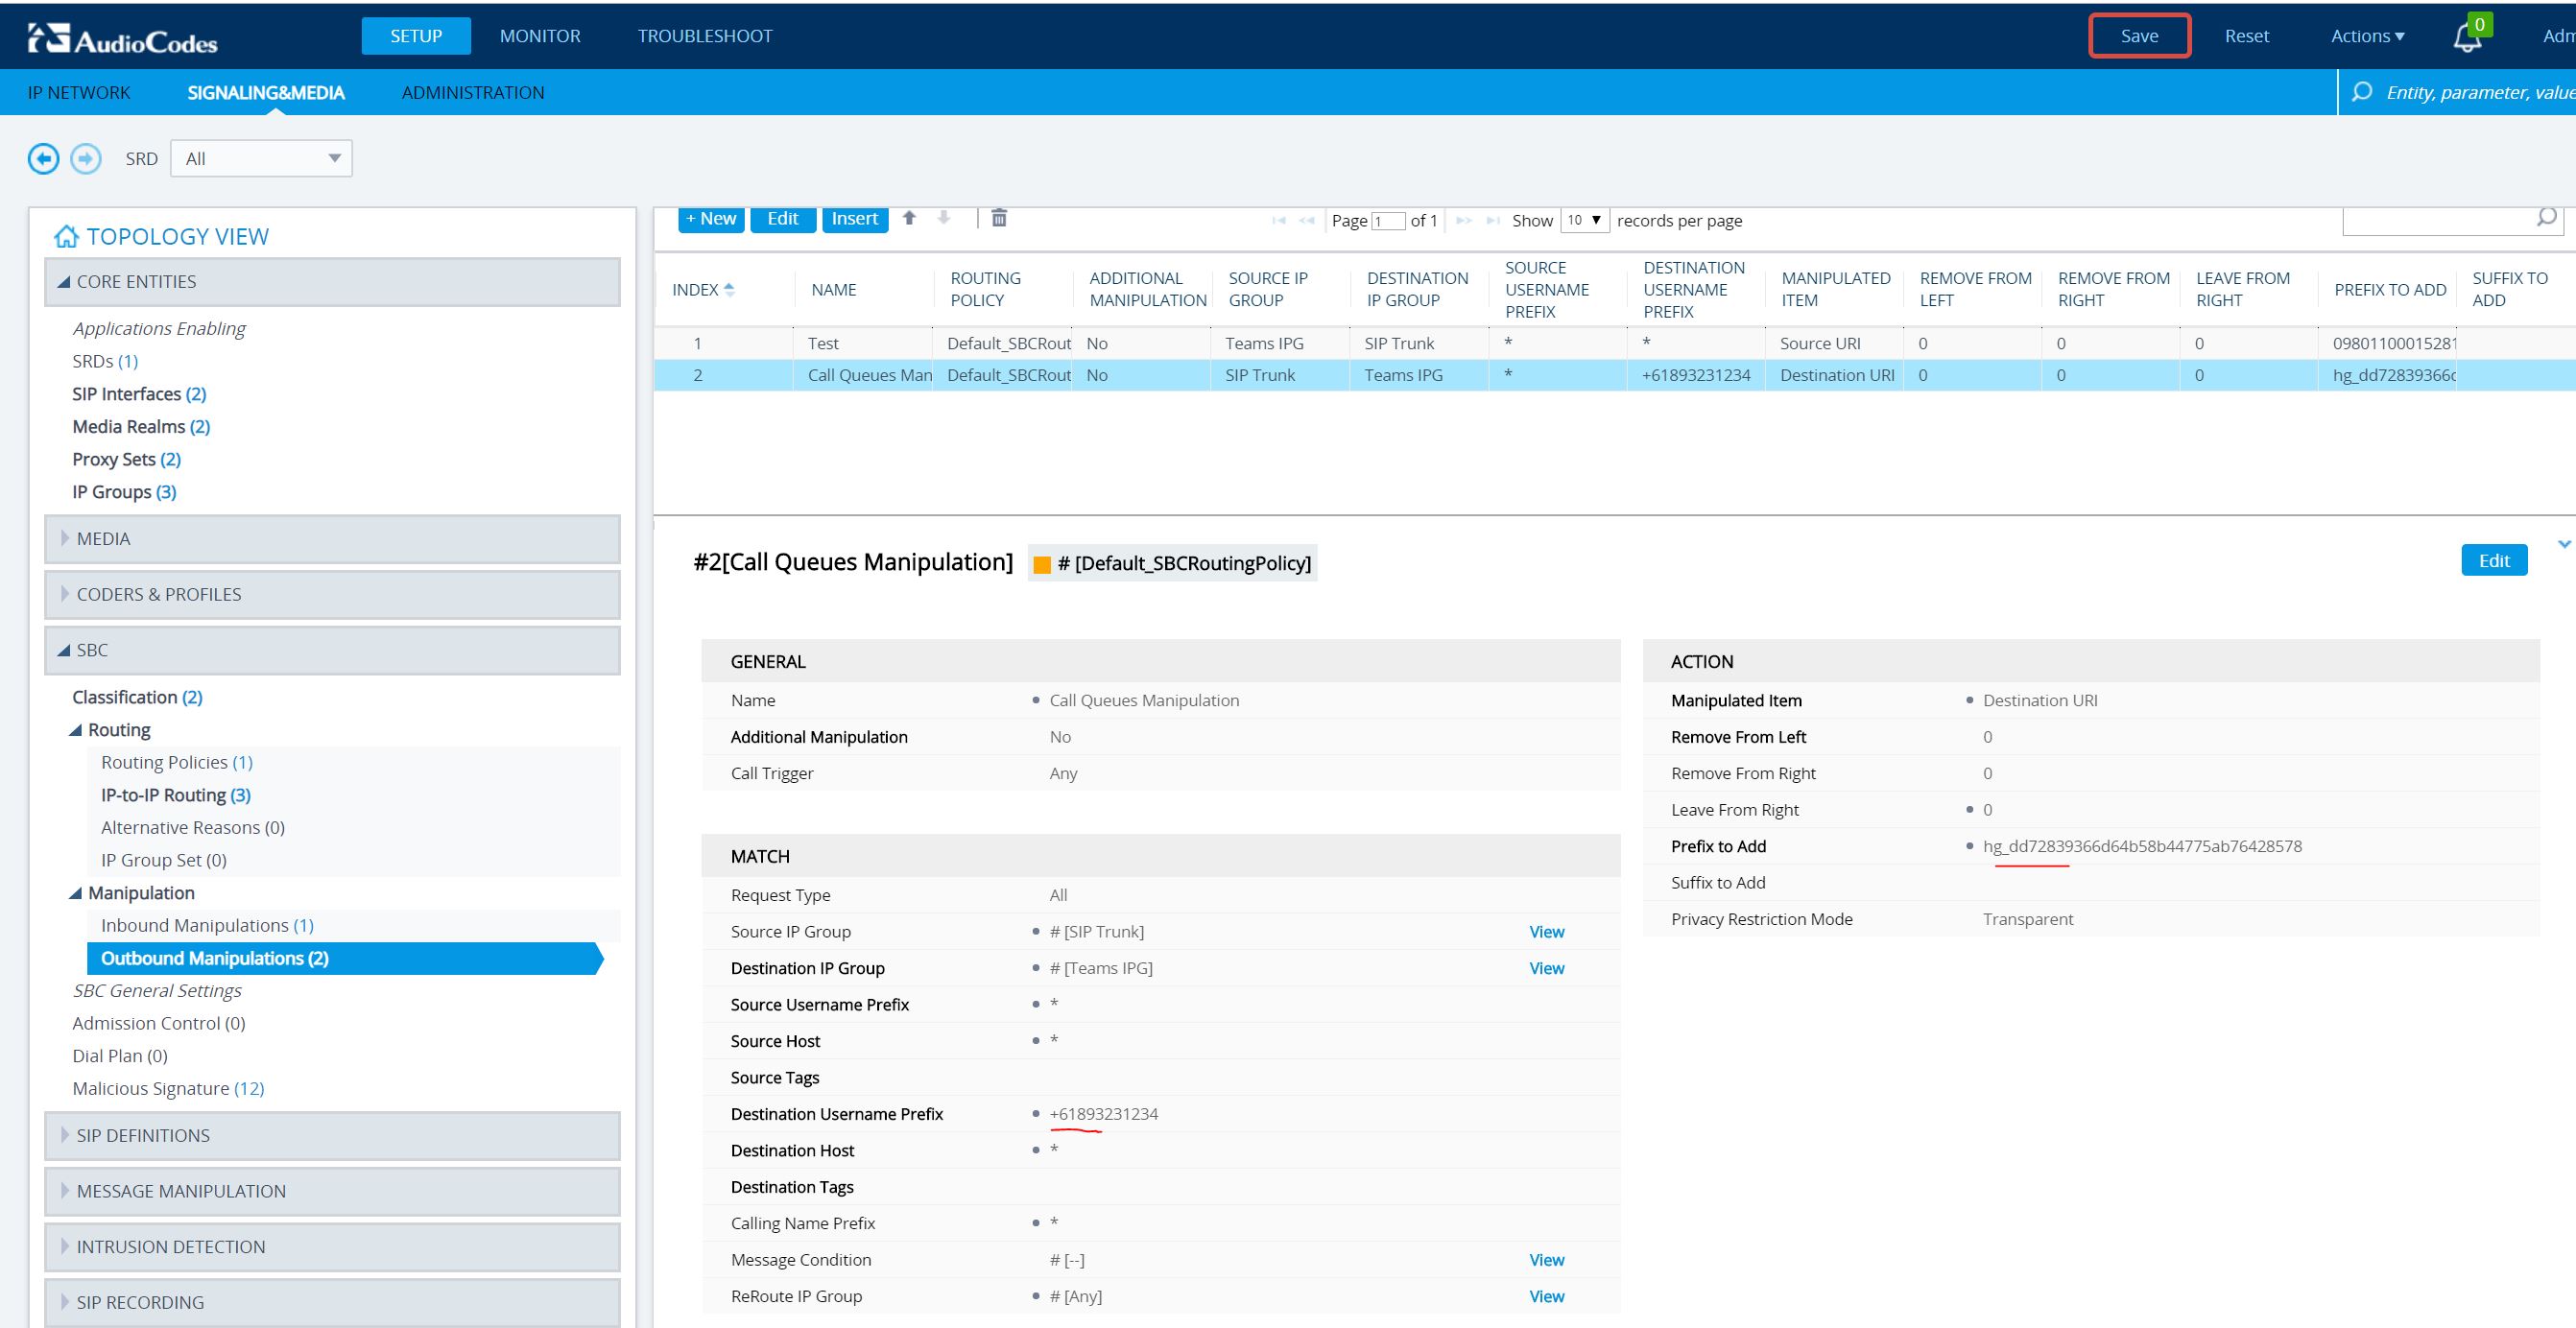
The configuration is completed now. When anyone outside calls the number +61893231234, the call will land on the Call queue. There were no Service number used for this configuration.
